
Alright y’all, brace yourself now and prepare your facial muscles. I’m certain I’m going to have some dropped jaws when you see what I did to my new horse trailer! LOL.
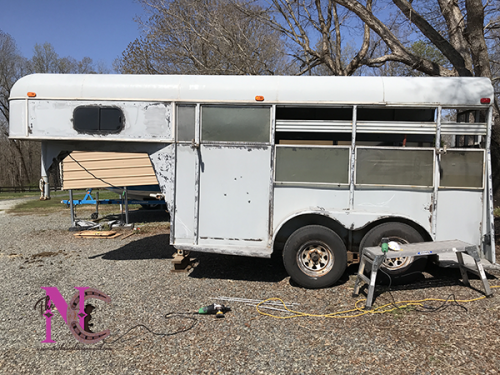
The quick story – I bought a small stock horse trailer to use for day hauling and it needed some TLC. The previous owners converted the front area of the trailer into a living area, which left barely enough room to trailer one horse. So everything had to go. We gutted the inside, removing everything but the wood side walls, and grinded down all the rust spots on the exterior so we could put a fresh coat of paint on and hit the road.
If you’re interested in the nitty gritty details, keep scrolling down . I must worn you though, I wrote a novel.
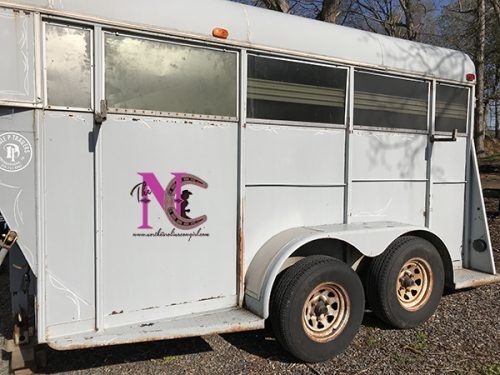
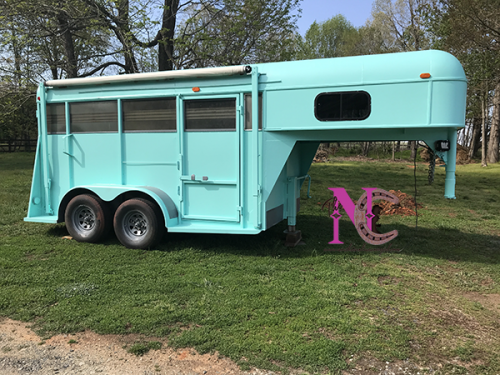
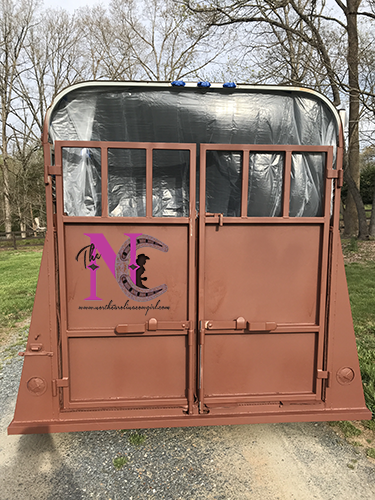
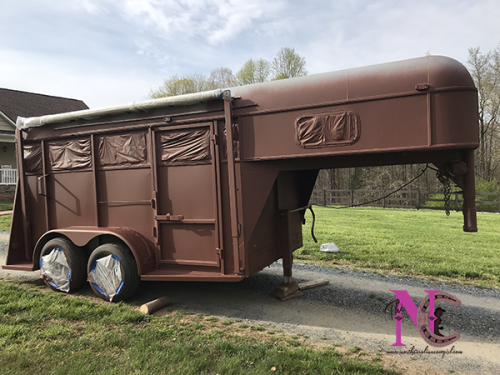
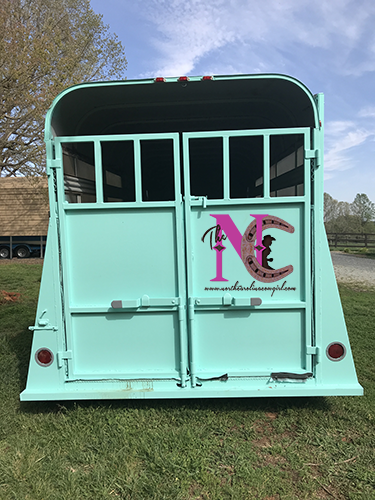
Since I’ve made some of you wait 2 weeks to see these results, I won’t make you wait any longer. 😉 Here are before and after pictures.
Now for those of you interested in all the details. Let’s get to it!
Part 1 – Horse Trailer #Demoday
Tools Needed
Hammer
Impact Driver / Drill
Crow Bar
Razor Blades with a Scraper
Whew Wee, talk about fun! Out of everything that had to be done, the 2 days it took us to gut the trailer, were by far the most fun we had during this project. Not to mention, my son and I got to do this together which made for some great bonding time.
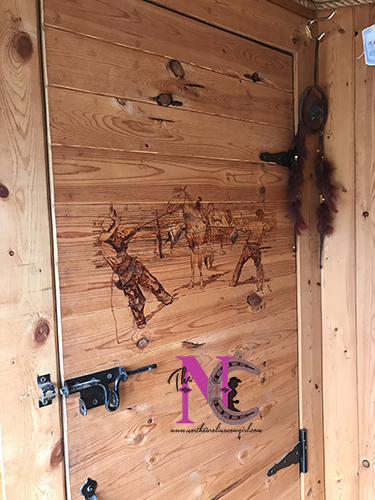
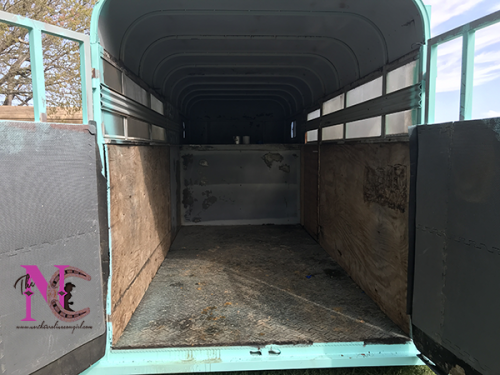
Here’s a look at the inside before we gutted it.
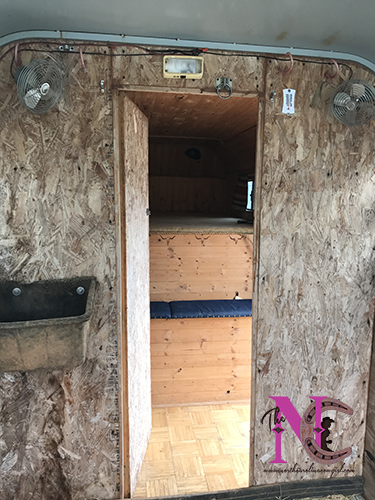
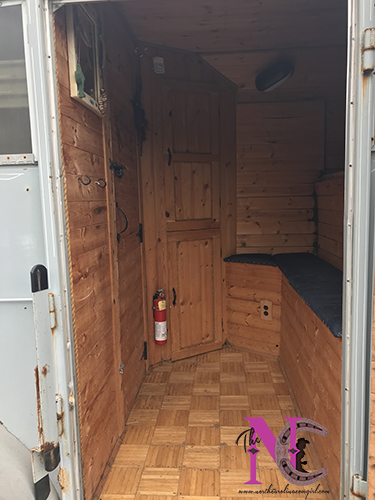
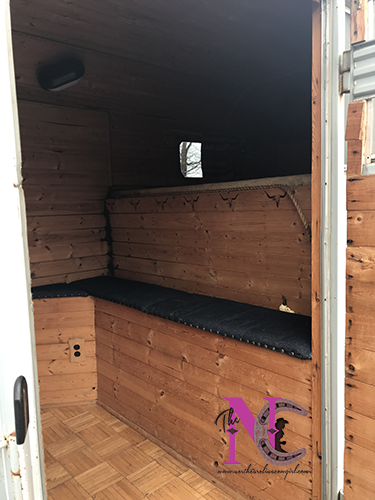
Because we didn’t want to mess up any of the metal or flooring, we had to take our time and unscrew each piece of wood that was screwed in. Once all of those were out – and I mean HUNDREDS – we finally got to start ripping the wood out.
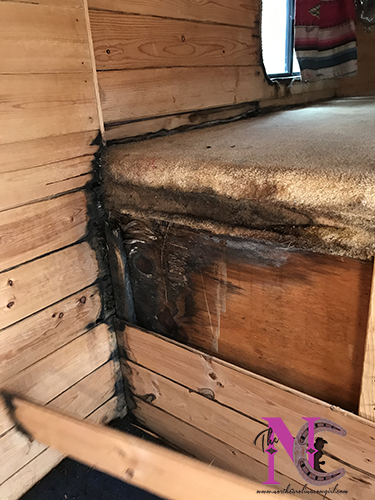
After the wood was out, we carefully took all the insulation off the walls and ceiling then removed the carpet. As you can imagine, this was a DIRTY nasty job. It wouldn’t have been so bad, if the LQ had been sealed properly and didn’t have water damage and MOLD growing in the walls. But it did, so in places the wood came out in small broken black pieces. Oh, and did I mention the thousands of ants we kept finding in the walls. Yep, you read that right. ANTS!
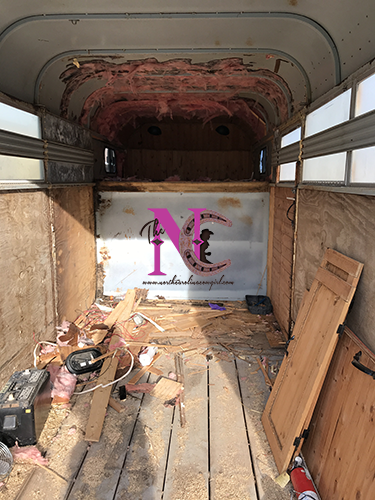
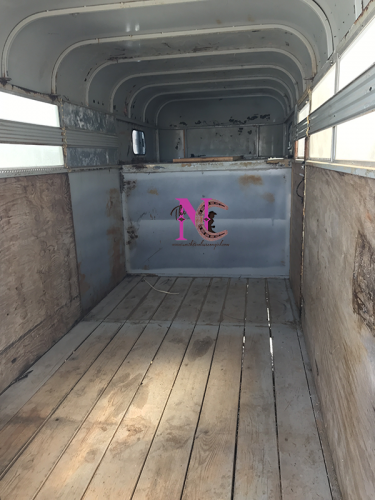
All of that’s gone now and the horse trailer is back to basics. I have the full 12 ft to haul in and now I just need figure out a clever way to make a tack area that won’t take up much space. I think I’ve got an idea though and as soon as I have time and the motivation, I’ll finish the inside. For now, it’s usable as is and I’m sooo ready to hit the road trail riding locally again.
Part 2 – Exterior Fixes & A Paint Job
MATERIAL LIST
Paint – 3 Cans @ $ 32.98 Gallons
Primer – 1 can @ $27
Quart of Metal Bonding Primer – $9.98
Quart of Gray – $12.58
Sanding Disc – 2 $11.50 ea
Wire brush – 1 $16
Spray Paint – 4 cans (2 primers, 2 paints) $3.98 per can
Paint Brush – $5.98
Tape – $10
Plastic – $1
Paint Thinner – $7.98
Tube of Caulk – $5
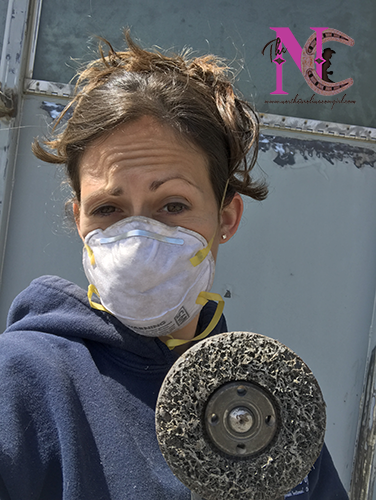
Masks – $6.58
Tools Used:
Grinder
Paint Gun – We did have to buy this, so I’m including the cost. $100
The inside was fun. The outside, was a lot of freakin’ work – that I had to do alone because no one wanted to do it, go figure! – but very rewarding when it was all said and done. I couldn’t be more proud of my little trailer and how great it turned out.
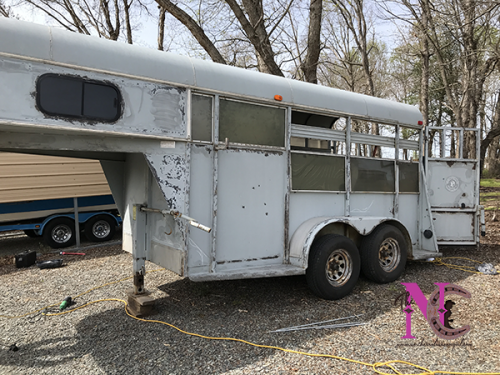
The exterior was a slow process and took longer than I had expected to finish.
First, we had to get all the rust off so it couldn’t rust any worse and the finished paint job would be smooth. To do this, I used the grinder with the wire brush attachment to hit the thick spots. Once those spots were cleaned up as best as I could get them, I used the grinder with the sanding disc to get the rust off down to the shiny metal.
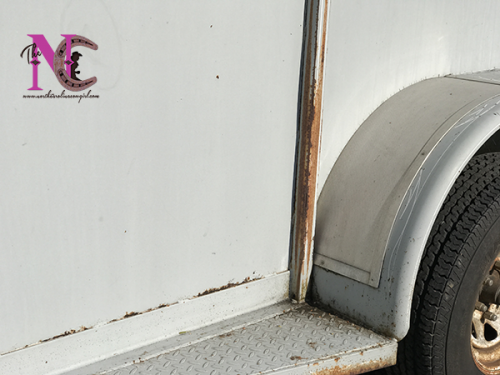
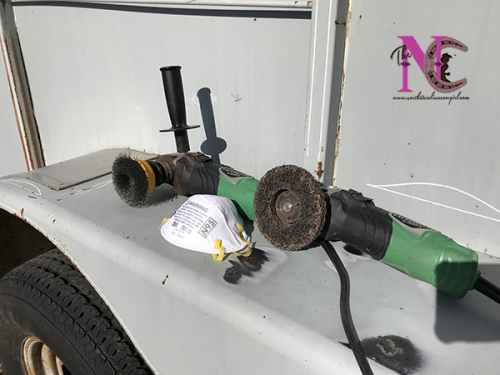
With the sanding disc, I could get off the pin stripes and remove any old caulk that needed to come off. If I’m being totally honest, I liked using this attachment better than the brush. I like that it cleaned the rust and paint off completely. I was surprised to find rusted spots under paint though. Not a ton of places and always near the badly rusted spots and under some of the pin striping.
Originally, I wanted to rent a sand blaster and remove all the paint and rust off the trailer so I could start fresh with the metal. However, I couldn’t find a sandblaster I could rent that would work with the air compressor we have. That’s why I ended up doing all of this by hand. You know how the saying goes, what doesn’t kill you, only makes you stronger! Now I know how to use some new power tools. 😉
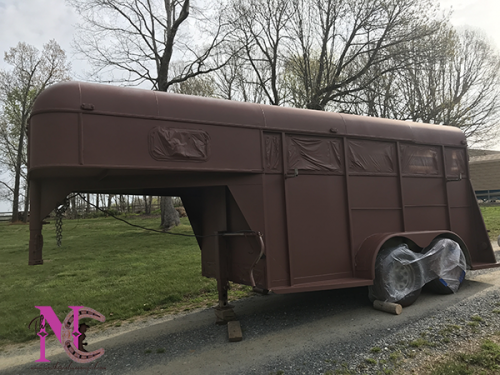
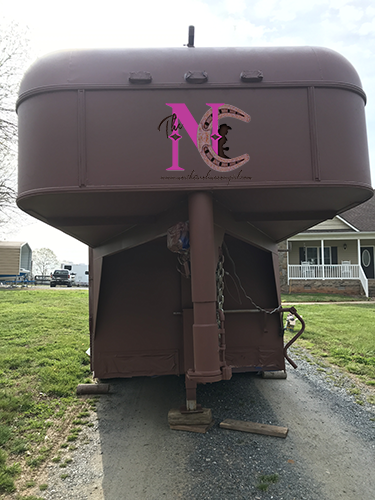
After the sanding was done, I prepped the horse trailer for priming. This meant covering all the windows with plastic and making sure they were tapped well so paint didn’t get on them. I also covered up the wheels & rims – although I didn’t do such a great job of that, whoopsy. I hung plastic in the back so I could spray the doors while they were shut and not get primer or paint on the inside. Lastly, I covered up the awning and each aluminum piece on the fenders and front of the trailer with plastic and tape. Before it was ready to prime, we re-caulked all the rails and around the lights and even the roof where the metal sheets met. (I can’t remember what the caulk is called but it’s a caulk specifically used for metal roofing.)
To prime the trailer, I used 1 can of Rust-Oleum Rusty Metal Primer and sprayed it on using a paint gun. Lawd, what a mess this made on me. The wind was blowing a little bit the day I did this, and OMG it got all over me. It was all in my hair and on my face. Ugh. Not a fan of oil-based paints. If I had to do this over, I think I’d used the bonding primer I bought for the aluminum pieces. It was a latex base primer that cleaned off so easy. As a note, it only took 1 can of primer to completely cover the trailer.
Once the primer completely dried – I gave it a full day and night – it was time to paint. Eeek!! I knew I wanted a teal color that would stand out and make a statement, so I went with “tantalizing teal” by Sherwin Williams # SW 6937.
Since I had my share of a horrible paint day already, my sweet husband offered to spray the trailer this time. He did a wonderful job too. He started with the top of the trailer and while he was up there I swear my anxiety was through the roof. I could just picture the metal caving in and him falling through. Thank goodness it didn’t happen, nor did I die from lack of oxygen intake during that time. Anyway, moving on, we sprayed the entire outside of the trailer in the teal. The only place we didn’t spray was under the fender or the rims.
Next, we took the wheels off, one side at a time and sanded them down to remove all the rust and then sanded the fender down as well. We used spray can primer on the rims and under the fender and then covered the areas with Gray spray paint.
Lastly, I hand painted the aluminum pieces and window trims with Valspar Binding Primer and then covered that with Olympic High Gloss Paint in Gray (SW 7074). As soon as it all dried, I removed the tape and plastic and it was DONE! ::Cue happy dance::
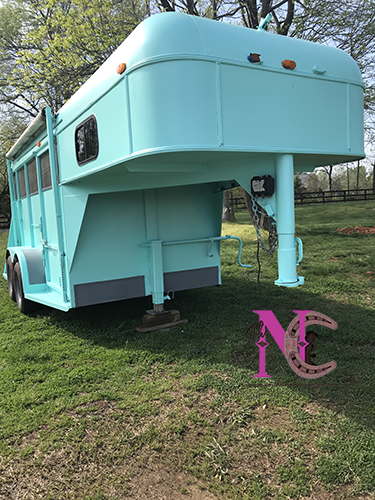
At first I did think the color was a little too bright but this week it’s really grown on me. I love the color of the trailer now. It matches my panel set. Plus, I don’t think there’s another one on the road that looks like it.
We just had a rain storm come through this week too and the paint still looks good and didn’t come off anywhere. There’s no reason my cute little trailer shouldn’t last me another 10 years. (BTW, this trailer was made in 1994! To be that old, it really has stayed in great shape and the rust was minor. No places had rusted all the way through.)
That’s it for now. I still haven’t finished the inside and probably won’t for a while since it’s usable as is. Eventually though, I will get the inside sanded down and repainted. As well as, adding a small “tack space” and putting up foam padding on the walls. When I get all that done, I’ll share it on here.
So Tell Me..
Have you ever done your own #fixerupper horse trailer project?
Most people tend to add LQs to theirs. I feel like I’m the only one who wanted to completely gut one. :/
16 Comments
LYNDA SHACKELFORD
April 19, 2018 at 9:27 amhey, you can sand and paint mine now!
NC Cowgirl
May 3, 2018 at 6:46 pmLol – Sure! But after knowing how hard that job was and what it’s worth to me, I’m afraid I might would price myself out of any job now. But I’d def be willing to do it for what I think it’s worth. 😉
Sunni
April 19, 2018 at 5:03 pmWow! You took on a huge project & it turned out great! Love the color…although anonymity will be completely lost lol Everyone will see you coming. Don’t think I ‘d be rushing into tack project phew!
Raquel
April 19, 2018 at 5:36 pmGirl, you just did a serious DIY project! You have basically made any project I’ve ever taken on look weak lol. The paint job on this is amazing!
Raquel recently posted..Ariat Two24 Fender Booties
Ellicul Nelle
September 22, 2020 at 5:17 amVery Impressive!!!
I kinda liked what The previous owner had there though knowing what it is like to travel w horses…,
My Experience w/ PEMF Therapy for Gracie and Myself
May 3, 2018 at 8:53 pm[…] and I actually got NOTHING from it. My neck and back were really sore that day from working on my horse trailer project, so I thought for sure it would help get the tension out and take some of the pain away. If not […]
Hannah
April 27, 2019 at 4:37 pmI have done my own fixer upper! Actually I got a horse trailer from my parents last year for my 20th birthday and well let’s just say it needed a good fixing up. It took about 3 months to finish it 100% but now that it’s done it looks amazing!
Lauren Gore
May 7, 2019 at 3:33 pmThe trailer looks great. I am getting ready to do the same thing for a smaller 2 horse tag along trailer. I am in NC too! I was going to paint mine gray but you might have me reconsidering making it look more vintage chic! tell me more about the cans you used and what type of paint brand and (flat, semi-gloss etc)
NC Cowgirl
October 25, 2019 at 7:37 pmI used a flat paint but honestly can’t remember what brand. I got everything from Lowes if that helps any!
Doreen Baldridge
May 28, 2019 at 10:22 pmAll i can say is WOW!
Sierra Blackford
June 7, 2020 at 7:00 pmAmazing job! I am about to do the same thing on my trailer. What brand is your trailer?
NC Cowgirl
August 31, 2020 at 3:11 pmIt’s a Double _ (something). I honestly can’t remember bc I painted over the name.
Autumn
August 8, 2020 at 1:39 pmSo it’s been 2+ years since you painted it. . . how’s the paint holding up now? I just purchased an older trailer and considering painting it myself as well! Just looking into paint types.
NC Cowgirl
August 31, 2020 at 3:09 pmIt’s held up really well! Besides being dirty, the color is still bright and pretty!
Stacy Cox
October 8, 2021 at 11:01 amIs there an after for interior of trailer?
Serrana atacado
August 6, 2025 at 3:13 pmHoly cow, y’all! You were NOT kidding. My jaw just hit the floor and I don’t think it’s coming back up anytime soon. That trailer went from a sad little junkyard dog to a show pony, no joke!
And for under $400?! I’m not even kidding, that’s some serious magic right there. I bet it feels like a million bucks rolling down the road now. The best part, though? Hands down, it’s that you and your son got to do it together. That bonding time is a real diamond in the rough.