
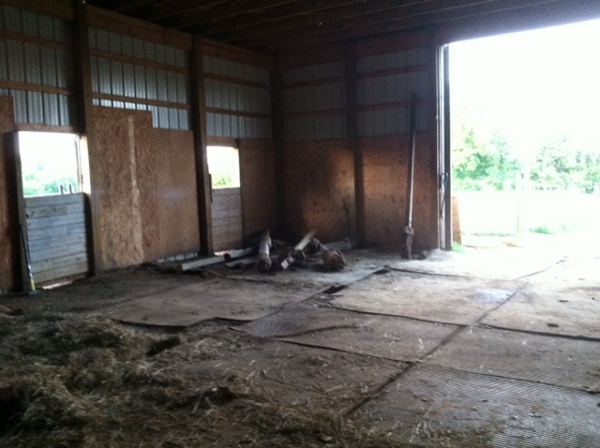
So you saw that we tore down the horse stalls that were in the barn when we bought it because they just weren’t safe for my horses.
Well I did a ton of research on horse stalls and tried to figure out what style of stall I wanted. I knew I didn’t want my stall fronts to have bars and seem confining but I wasn’t sure exactly how I wanted them to look. While searching the internet for stall kits I found lots of companies that offered great products but none had exactly what I wanted and to have them custom make what I wanted was going to cost a fortune.
Luckily, Tory has been in construction his whole life and was confident he could build me what I wanted; I just had to draw it out. So that’s exactly what I did. I drew out the horse stalls I had been picturing in my mind, which consisted of open stall fronts with arches, arched stall divider walls with bars and arched sliding stall doors with bars.
I choose to have open stall fronts because I don’t like stalls that are very confining and don’t allow the horses to see each other. I like stalls that are open and allow the horses to see each other but not touch.
So here’s pictures of the stalls being built. 🙂
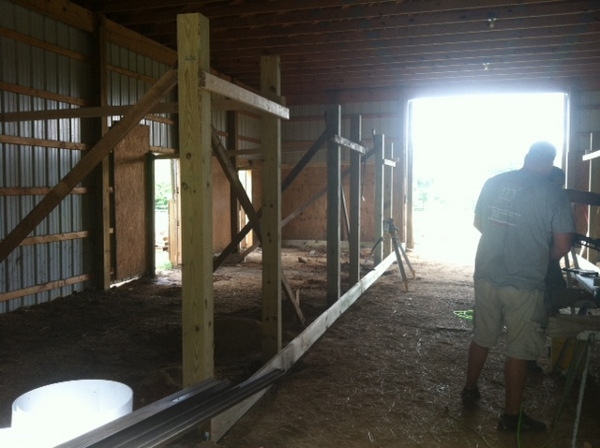
Posts being set for the stalls
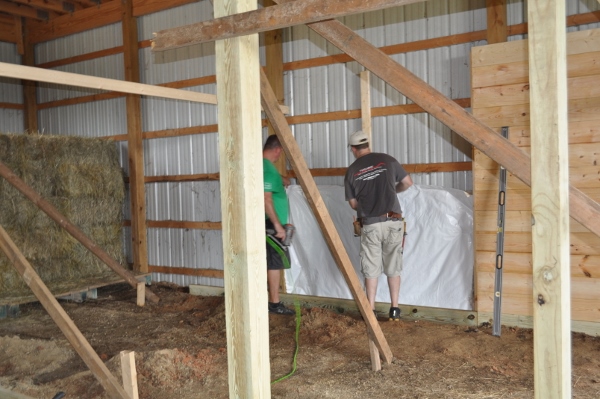
Insulation being put in between the outside metal and horse stall wall.
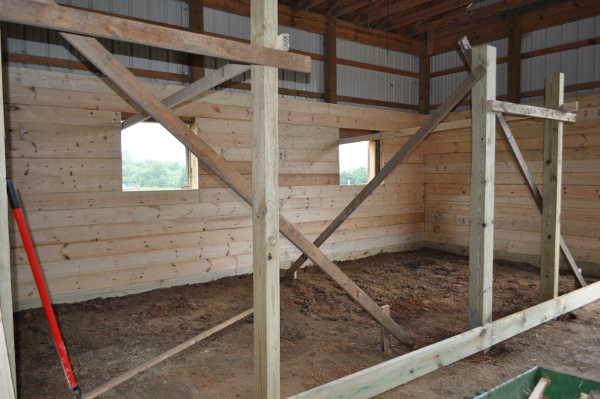
Outside wall for the stalls
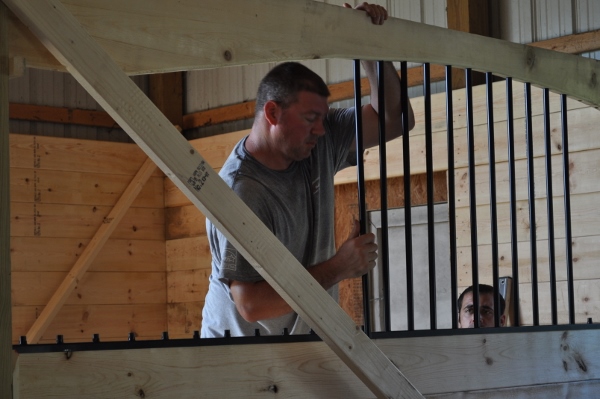
Horse Stall Dividers. Made with Porch Railing and arched tops.
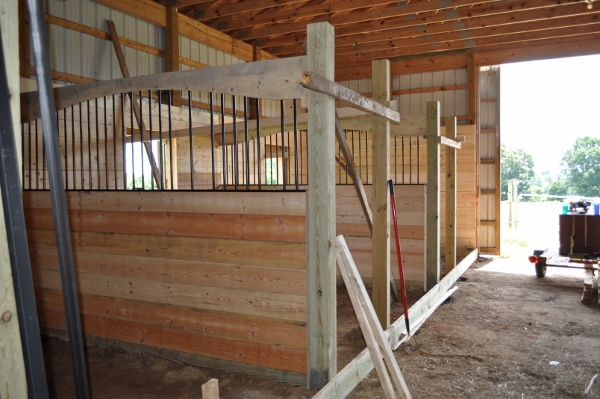
Side View of the finished dividers. (Missing spots were bars that we had to fix.)
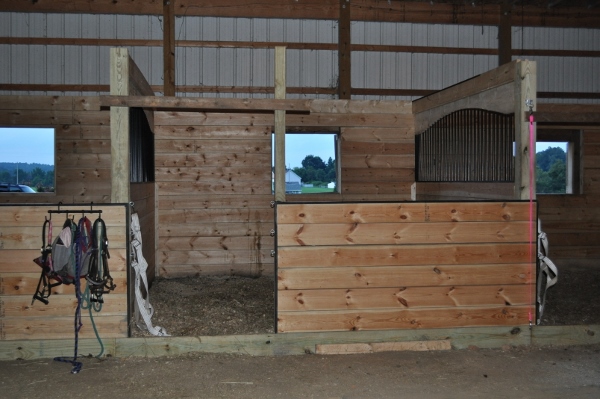
Horse Stall Front
The stalls walls are made from regular wood boards and then we covered the ends and tops with metal so the horses couldn’t chew on the boards. The stall dividers were also made with wood boards then holes were drilled into the board and we installed metal pickets used for backyard fences. The tops of the dividers are larger wood boards that Tory cut the arch shape into.
The next thing we’re going to work on is framing in the windows and building new window doors. After that we’ll build the stall doors and finish the front of the stalls so we can install the tracks for the doors to slide on.
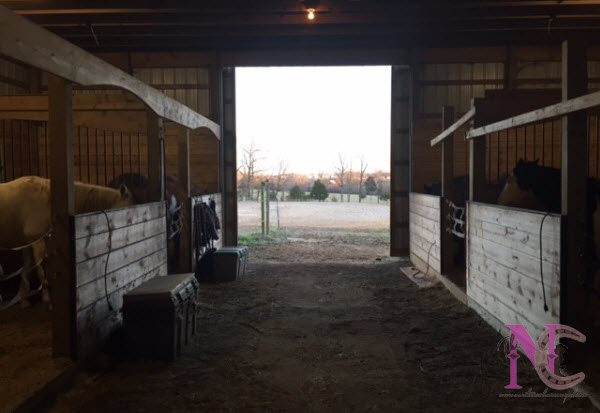
UPDATE: The barn is now finished and I’ve posted pictures on the finished stall fronts and stall doors!
UPDATE#2: The Step by Step guide to building these stalls is now available! So if you’re ready to start your very own project, click here to see the booklet options.
Have you ever built your own custom stalls? What did they look like?
20 Comments
Jamie
October 15, 2013 at 9:26 amWe also just bought a farm, my husband and I! Just moved August 31st. We are converting an unfinished detached garage project into our horse barn and building our own stalls. That’s how I got here, from a Google search on building stalls. I love your stalls! I also looked into kits and they are way too expensive (I prefer the European design with the low fronts).
I found metal balusters on the Home Depot’s website. But what are the metal pieces called that you used to edge all your wooden walls? I would love to copy that part of your design.
Thanks in advance!
Jamie
Ashley Agee
October 15, 2013 at 11:04 amHey Jamie, The metal pieces were bought from a local company and then we had a friend bend them for us. You might can buy them from a stall kit company but if you happen to be in NC I could sell you the pieces we didn’t use. You would just have to sand the rust off and paint them like I did. 😉
Jamie
October 15, 2013 at 11:19 amOh I’m in PA, but thanks for the offer! I’ll look around and see what I can find.
Cj
November 12, 2013 at 9:02 pmWhat type of metal was used on the edging of the stall fronts? I have a cribber and need something to go over the wood to prevent serious damage. LOVE the low fronts – ingenious on the porch railing!
Ashley Agee
November 13, 2013 at 8:10 amHi Cj! First let me say thank you for leaving a comment! I love hearing from my blog readers.
The metal I used was steel. I have a friend that works for a steel company so he get the steel and bent it for me. I believe you might can order just the metal from a few of the different stall kit companies but I’m not positive.
Life Just Happens But Change is Coming
June 2, 2014 at 8:54 pm[…] hope to finish up the stalls this summer too but at this point nothing else has been done with them or the barn. I promise […]
Jodi
September 25, 2014 at 4:17 pmHow did you tie in the dividing walls to the posts in the front and back? Love the stalls! I do not like the pre-made ones at all!
Jodi
NC Cowgirl
September 30, 2014 at 7:47 amWe nailed them in and then put wood pieces on either side and nailed those into the planks.
Heather
November 20, 2014 at 1:16 pmDo you have pictures from the stalls being finished yet? How did you build the stall doors? Thanks. Love your stalls!
NC Cowgirl
November 21, 2014 at 11:29 amThey are not finished yet. As soon as we get them finished, I will definitely be posting pics!
Kerrie Suckley
January 18, 2015 at 11:03 amOh my goodness! I googled different styles of stalls and came across yours. I was thinking the same exact thing, I have 2 horses and a small 20×24 size barn (that is being designed now and hopefully started in the next few weeks) and was trying to come up with a different idea rather than the stall kits you see online and that are very expensive. Please put pics up when yours are finished, would love to see them, hopefully we will be getting started soon, so excited!
NC Cowgirl
January 19, 2015 at 10:20 amI sure will. I’ll post updated pics this week. They aren’t completely done but def getting closer.
Horse Barn Improvements Part 4: Stalls are Complete
October 29, 2015 at 2:41 pm[…] Gutting the Barn • Building the frame and arched dividers • Custom Arched Stall […]
Barn Improvements Part 3: Arched Stall Fronts Complete
March 24, 2016 at 9:46 am[…] Then we started to build our own custom stalls. See this > https://thenorthcarolinacowgirl.com/farm-improvements/custom-arched-horse-stalls/ […]
Paige
August 15, 2018 at 3:02 pmHow many feet did you bury and concrete your posts?
NC Cowgirl
August 20, 2018 at 1:03 pmI’m honestly not sure Paige. I want to say 3-4 ft deep.
Portella
November 29, 2018 at 10:59 amBy no means am I a horse expert, but these stalls looks safe and secure. Are you still using them?
Lisa Mills
September 2, 2019 at 4:43 pmIn the picture you are putting insulation in….What type of insulation are you using?
NC Cowgirl
October 25, 2019 at 7:33 pmIt’s a roll insulation that we got from our local building supply. I can’t remember the name of it.
Jennifer
October 30, 2021 at 3:15 pmWe are getting ready to do almost the same thing as you! I would like to know what door slide hardware you used.